FREE Standard Shipping On All Orders $100 or More!*
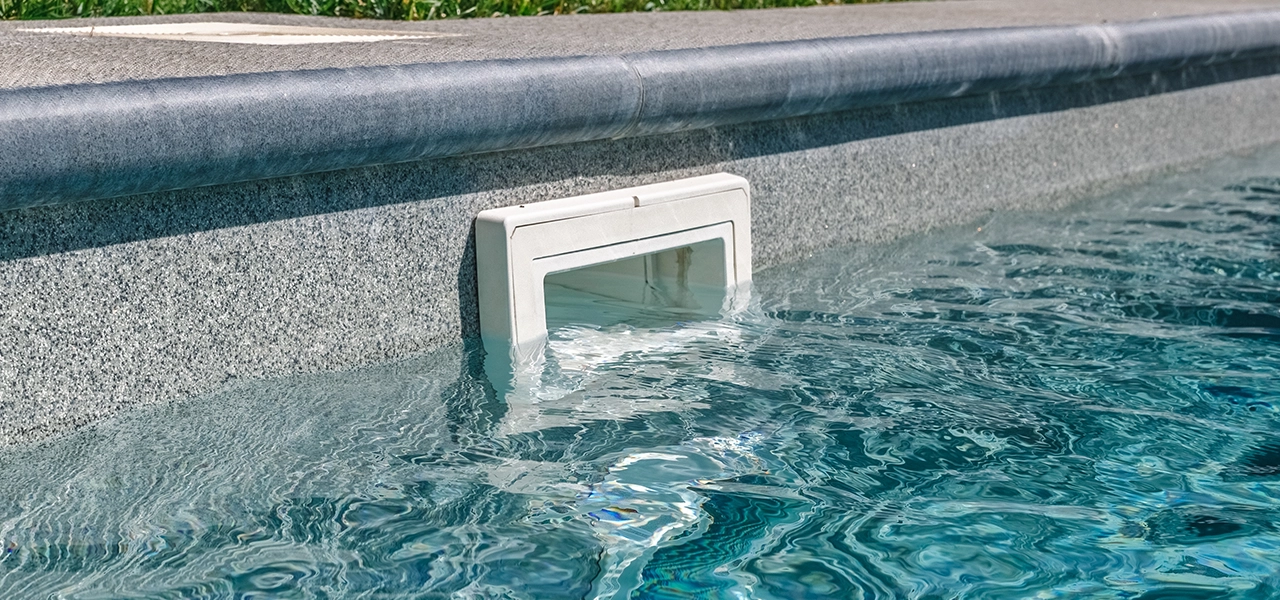
Pool Skimmer Winterizing and Antifreeze
Failing to winterize the pool skimmer properly can result in cracked skimmers and broken pipes come spring. Pool antifreeze: Is it needed? When should you use pool antifreeze in the skimmer, and when is it not necessary, except for extra peace of mind?
Above Ground Pool Skimmer Winterization
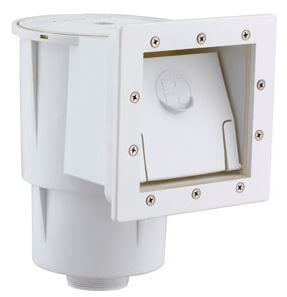
For most above ground pools, the skimmer is exposed and easy to remove the hose connected to the filter system. If that's the case for your pool, disconnect the clamp band and carefully (gently) remove the hose from the bottom of the skimmer. Store the hoses indoors for the winter, along with the entire pump and filter system, if you can manage that.
Hoses
After disconnecting the hoses, the water will drain below the skimmer and pour out on the ground. Since the skimmer is not connected to any pipes, there is no need to plug the skimmer. Any rain or pool water that gets in will simply drain out. However, it may not be wise to have the skimmer constantly drain water up against the edge of the pool. Over time, the ground will soften and your pool may start to list to one side. Better to leave the hose connected, so that the skimmer drains several feet away from the pool. Be sure to use rigid hose (not backwash hose, which can fill with ice all the way up to the skimmer), so that the water will run out unimpeded.
Pipes
If your pool equipment is hard plumbed, with rigid PVC pipe instead of removable hoses, you'll need to use other methods. The best method is to use air to blow out the line. Get a large wet/dry vac, rent or borrow if you don't have one, and reverse the hose so it blows air out instead of sucking air in. Remove the pump lid and pump drain plugs, and stick the wet/dry vac hose down into the skimmer. Hold it firmly over the hole while you turn on the vac to blow water from the skimmer to the pump. When empty, plug the hole in the bottom of the skimmer with an expansion plug, skimmer guard or threaded plug with O-ring.
You'll need the water to be below the skimmer to blow out the skimmer pipe, unless you install a Skimmer Plug. All of these seal up the opening to the skimmer to keep the pool water from entering the skimmer. The first two come with a new skimmer faceplate that you install, and a Tupperware™ type lid snaps onto the front. The Skimmer Plug is a new concept. Made of soft but rigid rubber, it pushes into your existing skimmer faceplate, making a tight seal around the inside of the faceplate opening.
Inground Pool Skimmer Winterization
To winterize a skimmer, in a nutshell, is to remove all of the water from the skimmer body and the skimmer pipe. Then, you need to plug the pipe or otherwise keep the water from getting back into the skimmer pipe. Finally, you'll need to have some protection from rain water or pool water that will get into the skimmer well and freeze, expand and crack the skimmer.
Drain the Skimmer
The first step must be to lower the water level in the pool below the skimmer. If you have a separate main drain line and a sand or DE filter, you can close off or plug the skimmer, and set your filter valve to backwash, waste or drain.
Let the pump lower the water at least an inch below the skimmer opening, then slowly open the skimmer valve to suck all, or most, of the water out of the pipe. If you have more than one skimmer, do each one separately, and you can pull most of the water out of the line. With the addition of some pool antifreeze, this may be a suitable skimmer winterization for a pool in growing zones 7-10. Northern pools should blow the lines out with air.
Plug the Skimmer
The second step in winterizing a skimmer after the skimmer pipe has been emptied or blown of water is to plug the pipe so that water can't get back into the pipe from the pool or from precipitation during winter. You can use threaded plugs with O-rings, rubber expansion plugs of size #9-11, or a Gizzmo can be used to winterize the skimmer. For threaded plugs, the O-ring is important, and using Teflon tape on the threads adds another layer of security. Make sure that rubber plugs have a good, tight fit.
Also on the market for winterizing inground and above ground vinyl pool skimmers is the Skimmer Plug, which seals up against the inside of your existing skimmer faceplate for a watertight winter skimmer plug. No need to replace the current faceplate; these are made to fit the inner dimensions. Brilliant!
Protect the Skimmer
After draining and plugging the skimmer, the final and often neglected step must be done. If pool water overflows into the skimmer, or as it slowly fills with rain and snowmelt, the water inside the skimmer, on top of the plug, may freeze during winter.
Water inside the skimmer well that freezes puts extreme outward pressure on the skimmer walls as it expands. To break up the ice sheet and protect the skimmer, use one of these three methods.
- Fill a quart or gallon jug one-third full of pool antifreeze, and drop in skimmer
- Use a Skimmer Guard or Gizmo type of skimmer plug
- Add pool antifreeze to the skimmer, on top of the plug
Inground Skimmer Plumbing Types
Dedicated Skimmer
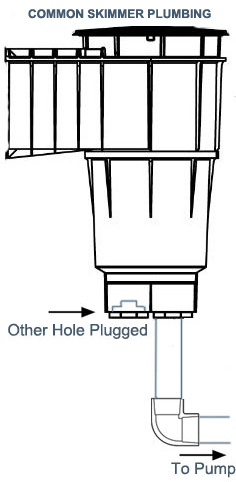
This type of skimmer is a dedicated skimmer line; no other line is connected into the skimmer. If your pool has more than one skimmer, they may join each other underground, or if you have a separate valve for each, in front of the pump, then they do not. This is the most common type of arrangement on pools built in the last 20 years.
This type of arrangement is best blown out with air, from the skimmer to the pump. Open up the pump lid and remove the drain plugs to make it easier to blow out. You can use a 5 horsepower Shop Vac™, a Cyclone blower, or a small air compressor to do the job. Nothing is done with the front hole, since there is no pipe connected. On some pools, a builder may have plumbed to the front hole and plugged the back hole.
Combo Skimmer: Side by Side
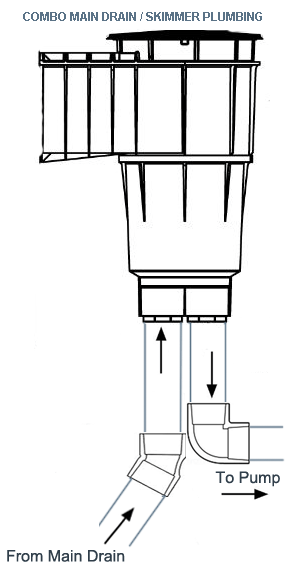
A "combo skimmer" is one which has the main drain plumbed into the skimmer to reduce costs by not running a separate pipe for the main drain all the way back to the pump, with a separate valve to control the main drain flow. In this arrangement, the front hole has been plumbed with a pipe from the main drain, and the back hole is connected to the pipe that runs back to the pump. A spaceship looking diverter, sits in the bottom, and allows for some control of the flow from top-down (skimmer) and bottom-up (drain).
To winterize this type of skimmer, first lower the water in the pool to your winter level (4 inches below skimmer for solid covers, 12 inches below for mesh covers). The skimmer should be mostly empty of water. Pour antifreeze into the main drain hole, about half a gallon, and you'll notice that the heavy pool antifreeze will cause the water in the main drain pipe to drop, or go lower in the pipe. As it drops, quickly plug the main drain hole with a properly fitting plug, twisting it tightly in place.
For the back hole, the pipe that runs to the skimmer, blow out the line with a wet/dry vac, Cyclone blower or air compressor. Alternatively, you can use pool antifreeze in the pipe, adding one gallon for every 10 feet of pipe.
Combo Skimmer: Old Style Sylvan
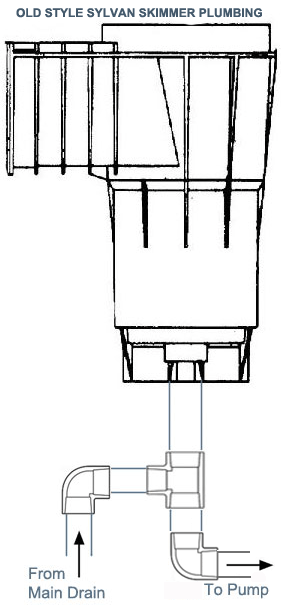
In this type of combination skimmer, used by Sylvan pools in the '70s and '80s, the main drain line is tied into the pipe underneath the skimmer and is not visible from above. To vacuum this type of pool, one uses a skimmer stick, a piece of 1-1/4-inch black pipe that drops down into the skimmer and effectively blocks off the suction from the drain. This type of skimmer can be identified by the presence of single main drains in the deep end and also in the shallow end. The return lines are also located directly below the skimmer, on the wall.
To winterize an Old Style Sylvan skimmer, one would use a long double plug, which has two plugs mounted on a long brass rod. Typically the plugs used are a #7 on the bottom and a #9 on the top. This is a very specialized plug. Some online retailers carry it, however.
Using this plug is also specialized. The way we would do it is to push it into the skimmer hole, about three-quarters of the way down, and then blow air from the pump toward the skimmer. Be careful to hold the plug while blowing air; it could blow straight up and injure someone. While blowing, air (and water spray) will be blowing up out of the skimmer, and eventually air will bubble out of the drain. After bubbling air out of the drain for about 30 seconds, quickly slam the plug down to its full depth and tighten up the wingnut, while the blower is still blowing.
Combo Skimmer: Old Style Anthony
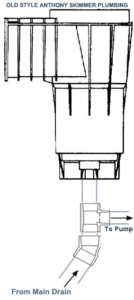
In this type of combination skimmer, used by Anthony pools in the '70s and '80s, the main drain line is tied into the pipe beneath the skimmer, not visible from above. It's similar to the Sylvan setup, but different, as the drain comes in from the bottom and not the side. Like the Old Style Sylvan, the skimmer will have a single hole, but Anthony used a threaded diverter that inserts into the hole and could be turned from full skim to full drain. Many of these pools have only one pipe coming into the pump, unless there was more than one skimmer, or an attached spa.
To winterize an Old Style Anthony skimmer, one could use also use a double plug, one that is shorter, made with a #8 plug on the bottom and a #9 plug on the top. Or, what we would do is use an extended #8 plug, and reach down into the skimmer, holding the plug with long straight pliers. Push the plug down until it comes to rest on the lip of the fitting, which is the start of the main drain pipe, and then tighten it up. This plugs off the main drain line and is just below the opening (on the side) to the skimmer pipe.
After plugging the main drain (you can pour in some pool antifreeze first if you wish), then you are free to blow out the skimmer line, using a large wet/dry vac, Cyclone blower, or air compressor. Blow air from the skimmer toward the pump, with the pump lid and drain plugs removed. When all of the air is out of the line, splash in another cup of pool antifreeze, and then plug the skimmer with a #9 or #10 expansion plug.
Skimmer Bottles
If you don't use a Skimmer Gizmo, you will want to use something to absorb the ice that forms inside of the skimmer. After you have blown out the lines, or filled them with antifreeze and plugged the skimmer, there is still one more step. Over the winter, the skimmer will fill up with water, splashing in from the pool, or from rain and snowmelt leaking in around the skimmer lid. This water will freeze and may crack the skimmer sidewalls.
You could just pour pool antifreeze into the skimmer on top of the plug, but that makes a slimy mess come springtime and may overflow out into the pool. What we like to do is pour pool antifreeze into an empty winter algaecide bottle, about one-third full, cap it, and drop it in the skimmer. The weight of the antifreeze holds the bottle down into the water as it fills up, and when it freezes, it will collapse the sides of the bottle instead of the sides of your skimmer.
Pool Antifreeze
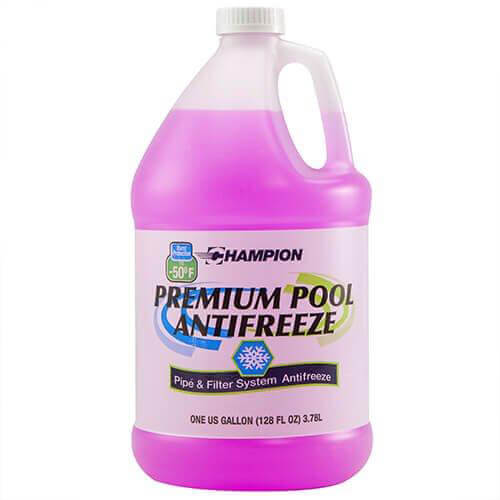
Pool antifreeze is also used for winterizing a pool skimmer, as mentioned above, to keep water from freezing inside of the skimmer well and cracking the skimmer.
- Make sure to only use product labeled non-toxic pool antifreeze. Automotive antifreeze is toxic. Ethylene glycol should never be used in winterizing a skimmer or pool.
- To winterize a skimmer, just pour pool antifreeze into the skimmer. For other pipes, you can introduce the antifreeze with a funnel and hose setup.
- Don't pour pool antifreeze into your pool equipment: pump, filter, heater. It can damage sensitive pool parts. And never add antifreeze to a chlorinator; a reaction could occur.
- To prevent the skimmer from filling up with rain water during the winter, you can use a piece of heavy plastic, placed under a tightly fitting skimmer cover, that will block rain and snowmelt from dripping into the skimmer.