10% Off Sitewide Sale + Free Shipping No Minimum*
Wrinkles in a Vinyl Liner Pool
Wrinkles in your vinyl liner. Not pretty to look at, and also causes some vinyl liner performance issues. Wrinkles in a vinyl lined pool can create some problems such as:
- Traps dirt up against the folds
- Risk of holes from cleaners snagging a fold
- Weakens the area that is folded
Here's some of the causes of wrinkles in your liner, and what you can do about it.
Pool liner wrinkles caused by chemicals:
If you keep your pool chlorine level consistently high, or your pool pH level consistently low - you could develop puckering in your pool liner. It can be a localized problem, due to chlorine coming in direct contact with the liner, or it can be widespread. Often this is accompanied by a lightening or bleaching of the vinyl.
Unfortunately, this type of liner wrinkle cannot be reversed, or easily removed. High chlorine and low pH can be very corrosive, and it literally sucks the plasticizer from the vinyl, causing the liner to contract and pucker.
Pool liner wrinkles caused by underground water:
An unfortunate situation, caused by a rising water table, with no topographical escape for the water pressure beneath the pool. Hydrostatic pressure can be so great in rare situations, that it can lift a concrete pool out of the ground - and it can much more easily push up a vinyl liner. It will appear as a bump under the liner, like a giant air bubble. When the water table recedes, the liner will come back down to meet the floor / wall, without wrinkles - if you're lucky. In many cases, however, the liner wrinkles as the water table drops and the liner comes back into place.
To fix this situation, look toward managing the run-off in the area surrounding the pool. Gutter run-off from the house is always suspect, so look to redirecting the water coming from the downspouts - away from the pool. In some cases, the necessary alterations to the landscape and topography surrounding your pool can be severe to correct the situation. Usually, however, some minor corrections can be made to keep ground water from coming to rest up against the pool.
What Causes Wrinkles in Pool Liners?
- Incorrect Liner Size: A pool liner that is too big, or too deep for the pool size and depth has excess material that folds over.
- Low pool water pH: Over many years' time, pH levels that are consistently below 7.0 may shrink the liner slightly, due to the acidic water.
- Pool Water Loss: If the water leaks out, or is pumped out of an old liner, the vinyl contracts, making it hard to reset the liner without wrinkles.
- Water Under the Liner: Rare, but high water tables can float a liner, bulging the vinyl liner. When waters recede, wrinkles are possible.
- Puckering:Usually caused by dropping undissolved granular pool chemicals onto the vinyl, or from chlorine tablets resting on a vinyl liner.
- Incorrect Installation: When installing a new liner, as described below, methods are used to prevent vinyl liner wrinkles during and after install.
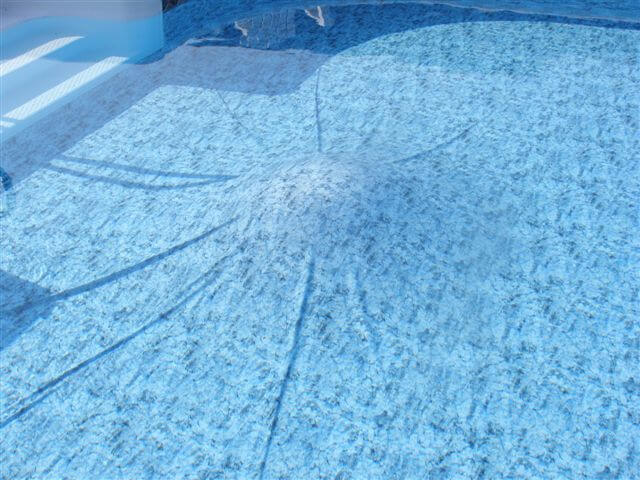
Pool liner wrinkles when installing a new liner:
This is the most common type of wrinkle in a pool liner. One cause is that the liner ordered is deeper than the pool, or too much additional sand was added while prepping the floor of the pool. A primary cause is poor measurement, especially of the hopper bottom, on inground vinyl liner pools. When installing inground liners, and in some cases aboveground pool liners, using a vacuum or shop vac is necessary to "set" the liner, or suck it tight against the walls and floor, before filling with water. When this step is missed or mishandled, pool liner wrinkles can result.
Overlap pool liners, and in fact all pool liners, should be just slightly above the floor before filling. The best fit of a new pool liner comes from having the liner stretch into place. Not too much of a stretch, or you risk stress and strain on the pool walls and on the liner. Before filling a pool with a new vinyl liner, you should position the liner so that it is off the floor by just an inch or two.
On oval or rectangular pools, having a "twisted" liner can also result in wrinkles while installing a new liner. Make sure to line up corners or the apex of a radius before filling. If you have diagonal wrinkles on the walls, you need to shift the liner in the opposite direction.
Pool wrinkles in a pool liner, caused by "slippage":
Slippage is my own made-up word, and it occurs on aboveground pools with overlap liners. If you don't have enough coping clips to secure the liner (securely) to the top of the pool wall, it can slip down the wall. First creating wall wrinkles, which work their way to the floor eventually.
Pool wrinkles caused by underground erosion:
Not a common cause, but in pools with a soft floor and active underground water, the floor can become distorted, as the base of the pool slips away under the weight of the pool. In some cases, a high water table leads to a liquifaction of the subsoil beneath the pool, producing all sorts of strange designs on the pool liners. Wrinkles in this case are accompanied by low depressed areas. Hard to keep clean, and not too handsome of a pool floor.
Pool wrinkles caused by water loss in the pool:
When the water gets below 6" above the floor of a pool, the liner begins to relax, away from the walls. If your pool loses more water, to the floor - the entire liner will relax and wrinkles will set in. The water loss can be accidental, in the case of a leak - or it can be drained intentionally, to correct poor water conditions. In either case, when the water gets too low in a vinyl liner pool, some care is needed to re-set the liner to prevent wrinkles. When liners are especially old and brittle, resetting can cause the liner to snap or break. Avoid draining vinyl liner pools, especially when the vinyl is showing some age, to prevent the sometimes unavoidable wrinkles or damage to the pool liner.
How to avoid wrinkles when installing a new liner:
- Line Up the Corners: Some liners are marked, others you'll have to follow the seams to make sure the corners line up.
- Even the Drape: Often pool liners tend to slide into the deep end. Sand bags or water tubes are used to hold it to the shallow wall if needed.
- Set with a Vacuum: Average pools use one Liner Vac or Wet/Dry Vac; larger pools need two. The Vac 'sets the liner', or removes the air between the liner and walls/floor, to keep the liner wrinkle-free until the water level is about 6" above the floor, at which point it can be removed. Duct tape is used to seal up the hose going behind the liner and down the wall, the skimmer and the step section.
- Push & Pull the Vinyl: You can also use a large brush on a pole, to help hold areas taut until the vac suction takes hold. It often takes many attempts before you are able to work out all the wrinkles, by pushing and pulling them towards the pool edges or just smoothing them out. If the vac suction sets the liner with wrinkles, shut off the vac, and make another attempt at working out the liner wrinkles, until you are able to get them all.
- Wait to Cut the Vinyl: The main drain ring and cover is placed first, with just 6" of water in the pool. But steps, lights, returns and skimmers all have to wait until the water level is up to the bottom of them. If you install the faceplate screws and trim before the vinyl has stretched fully, it can cause liner wrinkles, or can open up the screw holes into leaks.
Once the liner is installed...
After a new pool liner is installed over the wall (overlap liners), or snapped into the track (beaded liners), you should work out any floor wrinkles by "banging" them towards the side of the pool. Use a pool brush or push broom, or your hands to slowly work the wrinkles to the edge of the pool. Do this from up above, on the pool deck, or standing on the outside of the pool.
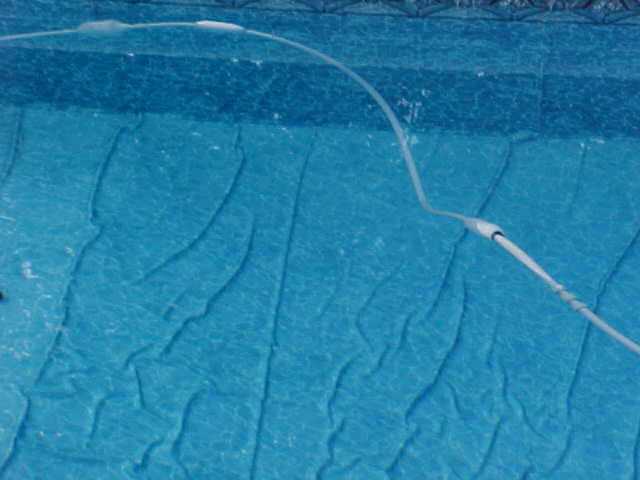
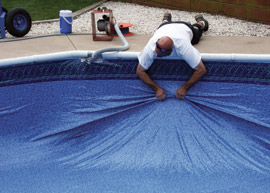
If you are using a vacuum to set the liner, the trick is to hang over the edge of the pool, shown right, and grab up the liner in both hands, giving it firm pulls toward the wall. Work your way around the pool, pulling any floor wrinkles toward the side.You may need to turn the vac off and on, while you work out the wrinkles in the liner, pulling them towards the side. It's best to do this work from outside of the pool, not inside the pool.
How to remove pool liner wrinkles:
- Small Floor Wrinkles: Remove half the water, but leave a few inches of water in the shallow end.Use a pool brush or toilet plunger around the area, as well as 'scuffing' the liner with bare feet, to try to push the wrinkle towards the nearest wall.
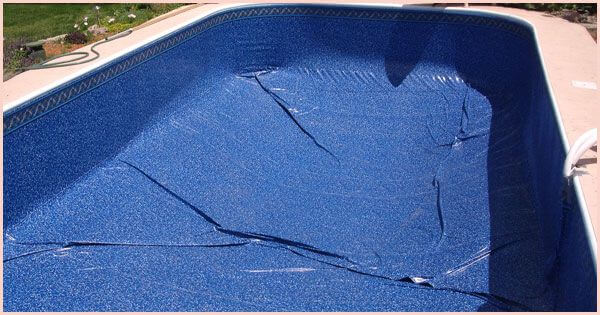
- Large Floor Wrinkles: If the vinyl is folded over more than 1/4", and they run horizontally across the floor from side to side, you may want to drain the entire pool and reset with a vacuum, after pulling the liner back up into the shallow end.
- Wall Wrinkles: Often these occur when the liner is twisted slightly in the track, or the corners are not lined up properly. Try to push the wrinkles toward the space in between the wall and floor by working with a floor squeegee, or just your hands.
If the pool is already full, try first with your feet. Wearing some soft rubber sole shoes can be helpful, but be careful not to kick the liner too hard. The idea is to spread out the wrinkle, into the surrounding area, or toward the wall, where the slack can be picked up in the area between the wall and the floor.
Lowering the water level down to just above the floor, removing much of the water weight, can be helpful - it makes the wrinkles easier to move. But again, try not to go too low, or you may risk more wrinkles appearing in your pool liner.
Wrinkles are always easier to remove when the water is warm, and when they haven't been in place for too long. If the wrinkles have set-in for many months, especially under winter water temps, they may be nearly impossible to remove. Not all wrinkles can be removed, sorry to say. Maybe you can live with them for a season or two - if not, you may need to replace the liner.