10% Off Sitewide Sale + Free Shipping No Minimum*
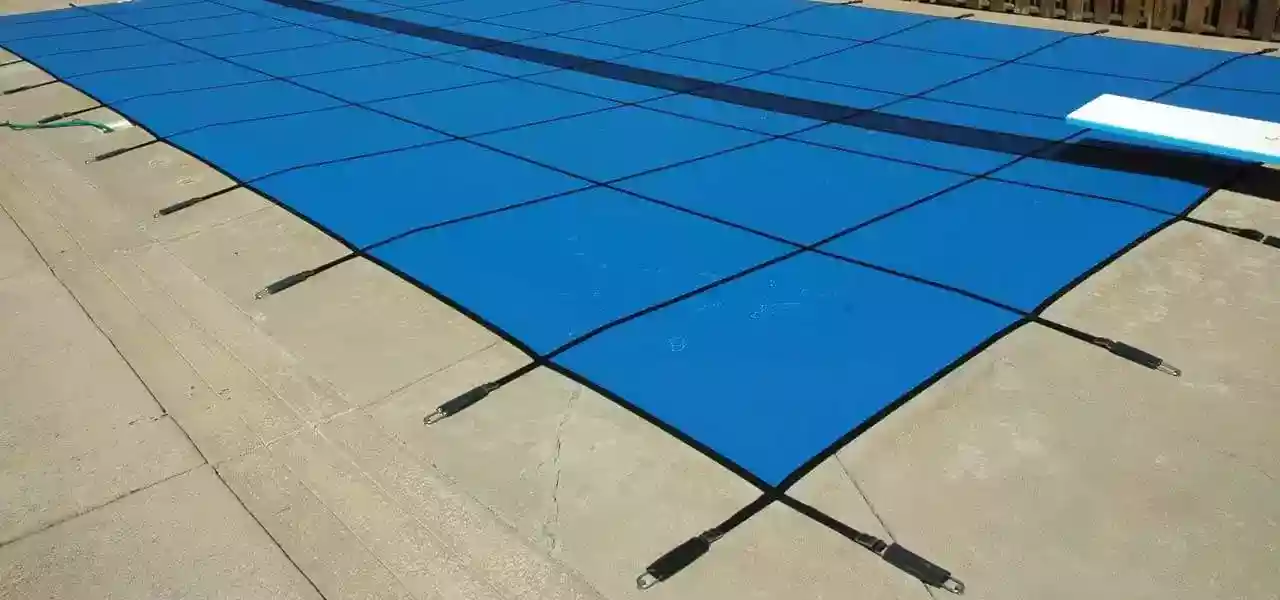
Top 3 Pool Safety Cover Anchor Problems
It seems to happen every year. One or two of your brass safety cover anchors either won't come up, or they won't go down - and some of them just spin in the hole.
Struggling with pool cover anchors is no fun, and leads to scraped knuckles and broken fingernails. Here are the top 3 problems with brass pool cover anchors, and solutions to fix or replace.
Types of Pool Anchor Covers
Stickers
Sticker anchors are pool cover anchors that won't turn up, and or won't turn down. The cause can be pressure around the top few threads, when an anchor is pounded into a hole that is just millimeters too small. This can happen when using a worn drill bit, but can be overcome during installation.
Another cause of stickers (stuck anchors) is tiny bits of sand or concrete particles in the threads. This can be avoided by regularly flushing out and using a light oil (like WD-40) on the safety cover anchors.
A third cause of sticky and stuck anchors is stripped hex holes. The edges of the hexagonal hole in the center of the anchor round over time, and can get to a point where the hex key spins. For stripped hex holes, insert a flathead screwdriver into the hole and spin until the hex lifts. If that fails, use Vice-Grips to clamp down on the top of the head and raise it slightly.
Spinners
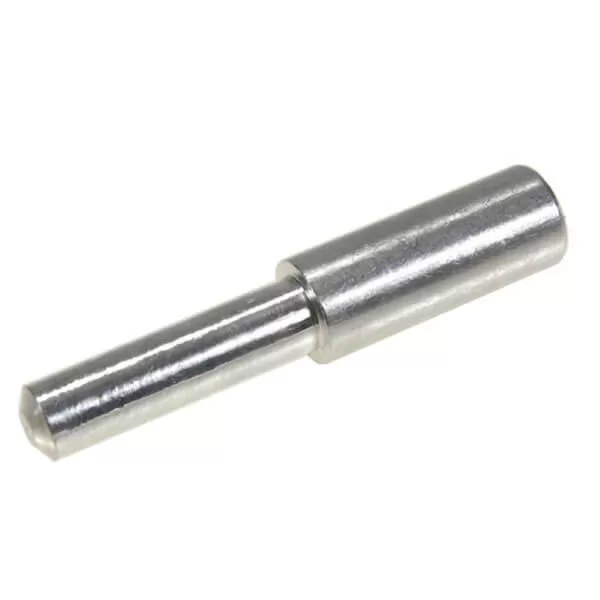
Spinners are safety cover anchors that don't have any grip left and just spin in the hole. Remedy this problem by re-tamping the anchor into the deck.
To re-tamp a cover anchor into the ground, remove the head from the body, insert the tamping tool into the body, and hit it a few times with a heavy hammer. If you don't have a tamping tool, or want a faster method, drop a nickel or dime over the head of the anchor, and hit it with a heavy hammer. Avoid hitting the head of the anchor directly with a hammer, which can warp the shape of the hex hole and the top edge, causing more problems.
3 Top Pool Anchor Problems
1. Anchor Hex Hole is Stripped Smooth
If the hole for the hex key is smooth, you won't be able to turn it fully. Make sure it's not your hex key that's rounded smooth, or stripped. Then, clear out any dirt or debris in the hole.
- If your anchor hex key hole is stripped, you can use a large flat head screwdriver - but not for the slots on either side of the hole. Tap the screwdriver head into the hex hole with a hammer, deep enough to "bite" into the edges. Then use pliers to turn the screwdriver handle.
- If the insert is raised, grab the edge with a pair of locking pliers, and the anchor can usually be turned, if it is not also seized up. If it can be fully removed, replace the anchor by tamping a new brass anchor into the hole.
Brass Anchor Removal Kit
A more permanent solution would be to replace a stripped cover anchor with a complete new brass anchor. Using our brass anchor removal kit, drill out the stripped hole with the drill bit, cut threads into the hole with the tap, assemble cylinder, plate, nut and bolt, and just simply turn the nut with a wrench to easily raise a broken cover anchor from the concrete.
2. Pool Cover Anchor Won't Turn
When the cover anchor is seized and won't go up, or won't go down. This can be caused by hardened grit in the threads, and/or from the outer body of the brass anchor being bent during installation into a poorly drilled hole.

- Cover Hex Keys: If your cover anchor key is twisting and bending with the force, try a Tee-handle type of 1/4" Hex Key, which can provide more leverage or torque. If you are using the standard L-Handle Hex Key, you will get more turning force when you insert the short end of the Hex Key into the cover anchor hole. Also, be sure that your Hex Key is not worn smooth on the tip. You can cut with a hacksaw and smooth on the concrete, to re-tip the end. You can also cut the Hex Key and use it with a power drill.
- Lubrication will usually help. WD-40™ or 3-in-1™ oil, or other lightweight, penetrating oil applied between the body and the insert. Allow a few minutes to soak in before attempting to turn it again. Lubricate the anchor if it will only turn a few turns before getting stuck again. A paper towel with a hole will absorb over-spray, which can darken concrete or damage painted pool decks.
- Rock it back and forth. When turning a stuck pool cover anchor, turn as far as you can in one direction, then reverse, and back in the original direction. An insufferable task, yet it helps to break up the grit in the threads. Grab the edge of the partially raised pin with locking pliers or a vice-grip. Use the pliers as a lever, and turn it back and forth.
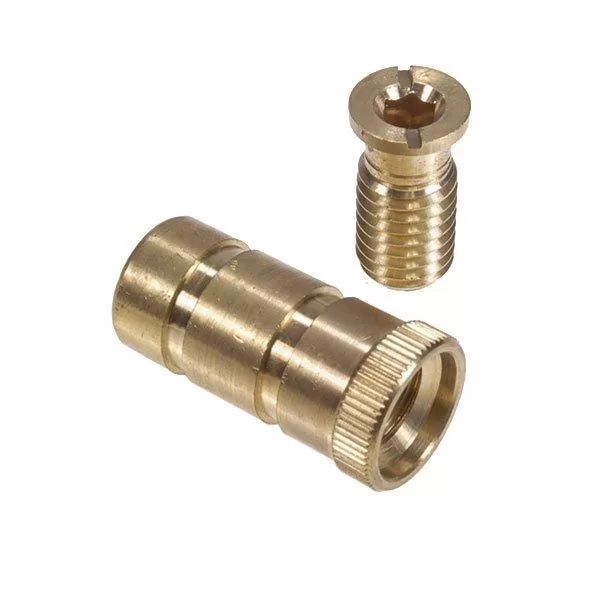
3. Entire Cover Anchor Spins
Only the top 1/8" of the brass pool cover anchor actually holds the anchor in the hole. When the anchor is tamped into the 3/4" hole, the 13/16" width of the anchor collar press fits into the hole. When the hole is too big, or the anchor was not tamped in place firmly enough - we get a spinner!
- With pliers, or with the hex key, you can pull the entire anchor out of the hole. If the anchor is partially raised, pry it out with a flathead screwdriver.
- Lubricate the anchor, then grasp it firmly with locking pliers in one hand, or place in a small vice, and turn it with your other hand.
- If the anchor spins but still functions well, you can just tamp the anchor back in place (be sure to use a proper tamping tool), or replace it with a shiny new brass cover anchor tamped into the deck.
Methods to Remove and Replace Pool Cover Anchors
Chip and Pry
With a flat head screw driver and a small maul, chisel out the concrete around the top of the anchor. In some cases, you only need to chip out on one side - then tap your screwdriver in under the lip of the anchor body and push downward. If you chip out enough of the concrete around the upper lip, you can pry the anchor out. You only need to remove 1-2 mm of concrete around the anchor, or sometimes just on one side.
Pry up the anchor with a large flathead screwdriver. Once you have chipped around the body of the anchor, and exposed the wider top ring of ridges, push down on the screwdriver to pry the anchor out of the hole. Another tip is to spray some WD-40® type of lubricant around the anchor body, after you have chipped the concrete from around the anchor, but before you start prying, to help loosen it from the hole.
Pull up on the anchor with vice grips. Use all your force to lock onto the anchor as tightly as possible. Straight pliers won't grip tightly enough in most cases. Once you have a good grip on the top of the anchor, push the pliers back and forth to work the anchor out of the hole. As mentioned above, adding a light lubricant around the anchor, after chipping, can be helpful. You can also a large screwdriver under the Vice Grips, while locked onto the anchor, as a pry tool to lift the anchor.
Tap and Tug
Drill out the hex key hole, then use the 1/4" tap to create threads in the hole. Place the cylinder over the anchor, slide the bolt through the cylinder and plate, and tighten it. Tighten the nut against the steel plate, and it will raise the anchor out of the hole.
Tap and Turn
Lubricate the anchor with WD-40, or you can also use a multi-purpose lube like 3-in-1 oil, or any other light, penetrating oil. Lubricate inside the anchor body, or between the threaded insert and the housing or anchor body. Initial lubrication is important, but it can be helpful to re-lube again, once you can raise the anchor insert slightly.
Tap the hex key with a hammer, while pulling the key in a counter-clockwise direction. This helps the key seat fully into the hole and generates heat.
Tap a flathead screwdriver into the corners of the hex hole using a hammer. A screwdriver with a wide body or hex stem works best. You can use vice grips on the screwdriver stem to turn the it and pull up the anchor insert.
Drill Another Hole
Another option would be to re-drill a new cover anchor, adjacent to the old anchor. Score or paint the old anchor with nail polish for easy identification. If the threaded insert piece is removed or missing, and you want to fill in the old anchor body, you can use pool caulk or concrete patch.
Sturdy anchors are key to ensuring your safety cover protects your pool. If you're dealing with broken or damaged cover anchors, don't stress! This guide will help you get your safety cover locked and loaded in no time.