10% Off Sitewide Sale + Free Shipping No Minimum*
DIY Spring Pool Opening
"How do I open my pool?" is a question on a lot of people's minds this time of year. Maybe you just installed a pool last year, or moved to a new home. Or, you're looking for tips or a refresher on how to open your swimming pool for spring. As anxious as many people can be about their spring pool opening, it’s really quite simple and easy!
Removing the Pool Cover
If you have a safety cover, begin by first clearing debris from the cover using a pool brush and/or a leaf rake skimmer net. Pop off most of the springs to reduce cover tension, which will make cleaning easier.
Use a leaf blower to clean the deck, and release the remaining cover springs from each anchor. Before folding, lower all of the brass anchors into the deck to prevent your cover from snagging. Carefully pull one section at a time up onto a clean area of the pool deck. Fan fold the cover, accordion style, seam to seam. Use a leaf blower or garden hose to clean the cover before making each new fold.
Stuff it into the cover bag and set it up on a chair to drip dry. Store the cover indoors, if possible, or use moth balls or mint bags to keep nesting rodents away.
Removing a Solid Pool Cover
If you have a solid pool cover or an above ground pool cover, use a cover pump to remove any water on top of the cover. Clean off any leaves and debris with a pool brush or pool leaf rake. For inground pools, remove the water bags one at a time, careful not to drag them across the concrete, or drop them. Drain them completely, and then clean, dry, and store them away.
For above ground pool covers, loosen the winch & cable system or cover clips, after draining the cover. Then carefully pull the cover off the pool and roll it up so you can carry it. Take the cover to a large area where you can clean, dry, and fold it. Store indoors if possible, or inside of a plastic bin or large trash can, or placed up across the garage rafters.
Winter Freeze Plugs
Make sure all winterization plugs are removed from the pool before you start the filter pump. There are also drain plugs for the pump and filter removed in the fall. Now is the time to re-install these plugs again, using Teflon tape or other thread sealant to prevent pump air leaks or filter drips. Drain plug o-rings should get a bit of Teflon-based pool lubricant to help maintain a good seal and protect the o-ring.
Also use some of the Teflon lube on the pump lid o-ring and on other rubber o-rings on the pool filter or push-pull backwash valve.
Pool Equipment Reassembly
- Resecure ladders and hand rails into deck sockets.
- Remove all plugs from wall returns, cleaner lines and skimmers.
- Replace skimmer baskets and wall return eyeball fittings.
- Pull out the pool cleaner and stretch out the hose straight down the deck, but don't connect it yet.
- Check and inspect diving board bolts or slide legs and ladder for safety.
- Check that floor drain covers are securely attached for safety.
Pump Equipment Reassembly
- Replace drain plugs for the pump and filter, and heater or chlorinator.
- Screw pressure gauge onto top of filter tank, with Teflon tape.
- Open all closed valves, and place filter valve in the filter position.
- Check that the filter grids or cartridges are inside the tank, and the filter clamp band is tight.
- Lube the pump lid o-ring, and plunger o-rings.
Starting the Plumbing System
Starting the plumbing system will be different for every pool. First, if you have a multiport valve with the option to send the water to “waste,” select that setting. Doing this will prevent dirty winter water from sticking to your filter as you prime the system. Roll out your backwash hose and pump the water out from the skimmers and drain.
Make sure all valves to and from the pool are open before turning on your pump to begin priming. If you have a separate main drain line, you may have more success starting the system with this valve closed, starting it "off the skimmer", as they say.
Pump Won't Prime?
If the pump doesn't catch prime and begin pumping at full steam after a minute or so, shut it off and repeat the priming and starting process. If it still won't prime and catch, try starting off one skimmer only, or try opening the main drain valve. DE or sand filter with a multiport, you can place the valve on waste or recirculate for start-up. Pool pumps will catch prime more easily if the water isn't forced through the filter, and either waste or recirculate has less resistance to overcome. If it still won't catch, look for air leaks, usually from a loose pump lid, or loose pipe coming into the pump. A Drain King can be used to help prime a pump from the skimmer, and also to pressurize suction lines and pump to look for air leaks.
When the pump is running full steam, slowly open the main drain valve to introduce a bit of air, until you can open it fully. If the pump bogs down and loses prime, close the valve fast, until it catches prime again.
Start the pump again, and keep an eye on the pressure gauge. If it spikes above 30 lbs, shut off the pump immediately and look for the reason. It could be due to a closed valve on the return line, or plugs left in the pool. If you have a DE filter, add the D.E. powder into the skimmer quickly.
Close the air bleeder valve when it sprays a continuous stream of water. Note the filter pressure at start-up — this is your clean, starting pressure. Write this number, the clean psi reading, on your filter tank with a permanent marker, or make a mark on the gauge face with a Sharpie pen or marker.
Cleaning the Pool
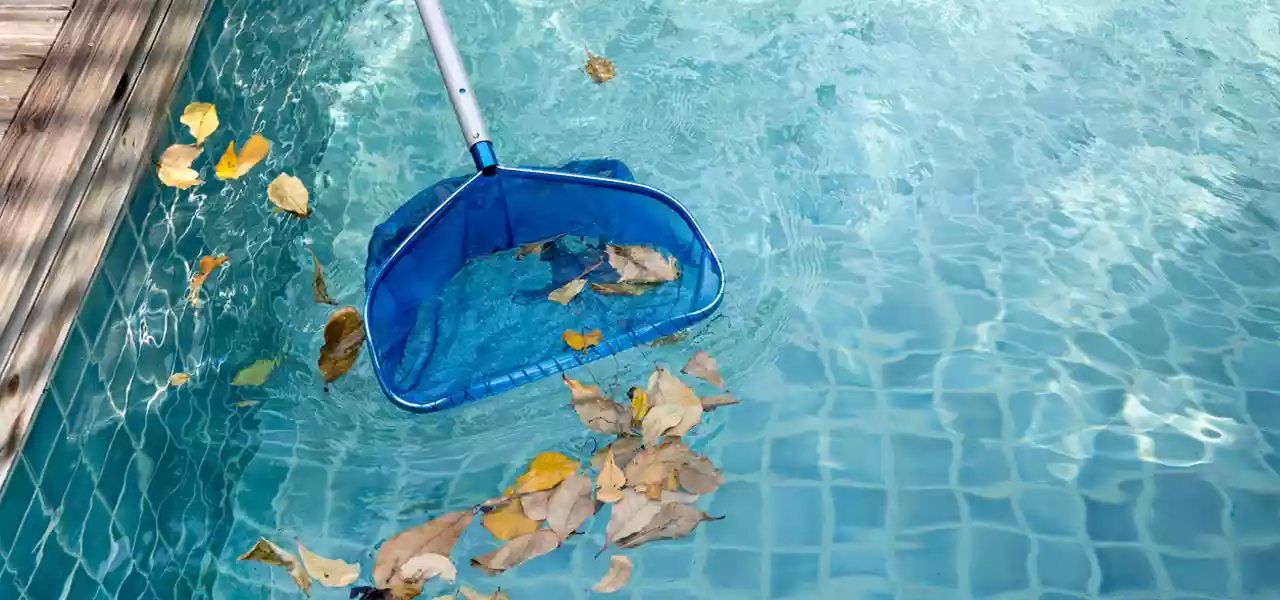
The initial cleaning is crucial after a spring pool opening. Make sure to first brush the tiles and pool walls, then use a skimmer net or leaf rake to clear off the surface, then vacuum the bottom of the pool. Depending on the amount of debris and leaves on the bottom of the pool, you may need to use a leaf canister or a Leaf Gulper to avoid overloading your strainer.
Water Chemical Balance
Balancing your pool water during spring pool opening begins with a high-quality pool test kit. A good test kit evaluates the chlorine, pH, Calcium Hardness, Total Alkalinity, and Cyanuric Acid levels in your pool. Accurate testing is important for accurate treatments. Be sure to replace your test reagents annually, and store them in a cool and dark location.
To make balancing your pool water easier, take a look at our Spring Start-Up kits. These kits contain all the necessary chemicals to get your pool up and running. Once your pool water is balanced, retest it over the next few weeks to ensure it maintains the proper levels.
If you followed a winterizing procedure and used a winterizing kit at the end of the previous swimming season, your chemical balance shouldn't be too off base. Use a quality algaecide, clarifier, and pool shock, to kill any potential algae.
Fixing Leaks
Since you have been running the pool system throughout the process of spring pool opening, you should be able to identify any leaks in your plumbing. If you spot any leaking water, shut off the system and locate the crack or damaged plumbing. Patch up small cracks or leaks in the plumbing equipment with a pool leak sealer or pool putty. However, if the cracks or problem areas are larger — replace the damaged section of pipe or fittings.
As you inspect the skimmer weirs, look around the area where the plastic skimmer meets the pool wall. Cracking of the plaster mix around a concrete skimmer, or rusty spots around a vinyl liner, may indicate a leak. If you spot debris stuck in these areas, this is indicative of a leaking pool skimmer. Use epoxy putty or pool plaster mix to fix a concrete skimmer. For vinyl skimmers, use a vinyl patch kit or replace the skimmer faceplate gaskets to fix the leak.
In The Weeks to Come
Run your pool filter 24/7 for a few days, checking on the filter pressure and water flow every 8 hours or so. Backwash sand or DE filters when the pressure gauge rises 8-10 lbs above the clean, start-up pressure. For cartridge filters, shut off the pump, remove the filter and rinse it off with a garden hose spray nozzle, when pressure has risen at least 5 psi, or flow is noticeably reduced.
When the water clears, you can set the time clock to run 12–15 hours daily, increasing to 18 hours daily when water temperatures approach 80°F. Maintain a constant chlorine level of at least 2.0 ppm. Check your pH weekly, and your Total Alkalinity, Cyanuric Acid, and Calcium Hardness levels monthly. Shock the pool every 4–6 weeks, or if algae is visible.
Keep the pool clean with regular skimming, vacuuming, and brushing. Also empty the skimmer and strainer baskets regularly to avoid blockages. Check the filter and water level and condition every day when possible, to ensure all systems are operating.
Understanding how to handle a successful spring pool opening is the key to setting yourself up for a great swimming season. As long as you maintain regular water testing and a cleaning schedule, you can worry less about major water treatments or repairs.