FREE Standard Shipping On All Orders $100 or More!*
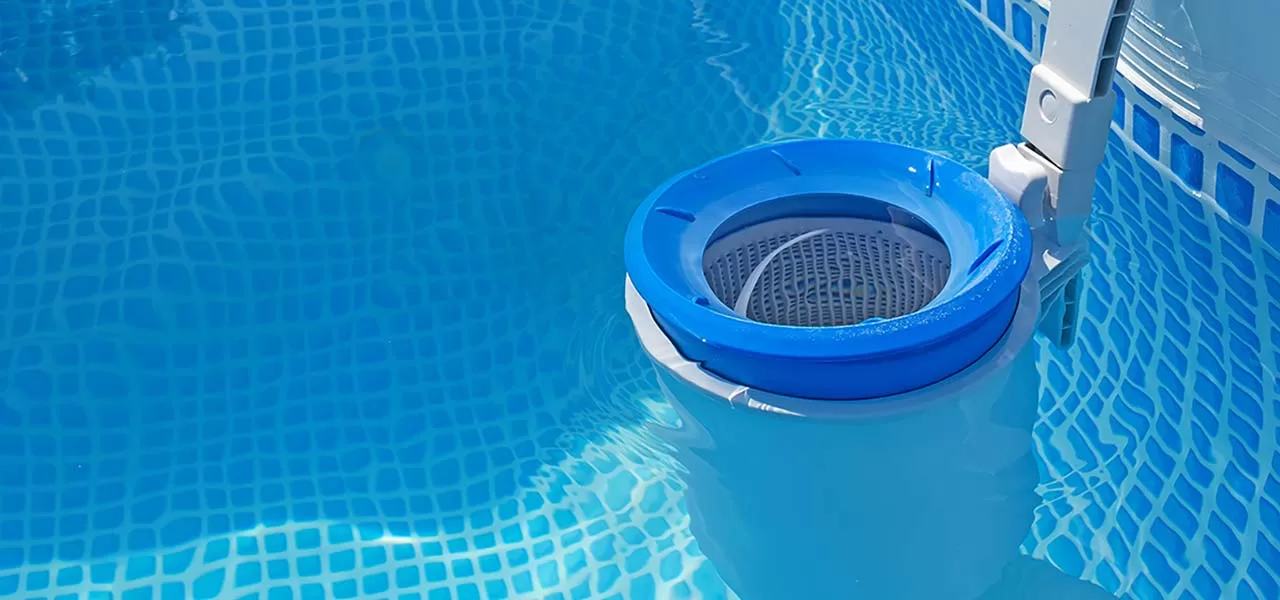
Above Ground Pool Skimmer Installation
How to Install a New Above Ground Pool Skimmer
How is your skimmer looking this year? As you head on out to the backyard this spring, you may be surprised at what you find.
Skimmers can crack even in the mildest of winters. Or, if you are planning on a new liner you may want a nice new skimmer box to go along with it.
Skimmer replacement is easy, you just need to know what type you have. Most skimmers have a manufacturer name and model number molded on them. Once you have that information, you can search for it at In The Swim or call one of our friendly representatives to help identify your above ground skimmer and place the order for you.
Once you have received your new skimmer you may be shocked to find there are no instructions in the box. I guess they expect that you still have your original owner’s manual of the pool. But if you do not have that, the process is fairly easy.
I replaced my own skimmer when we changed out the liner on our 24-foot round pool. Begin when the pool is almost full with water, an inch or two from the bottom of the skimmer. Stop filling the pool until the skimmer(s) and return fitting(s) are in place.
I had a friend assist me with replacing my skimmer. She was on the outside of the pool while I took the chilly plunge into the freshly filled cold water to work from inside the pool. Trust me, I was nervous to make that first cut of brand new pool liner, but it turned out just fine. I followed some skimmer replacement tips my coworkers gave me.
Replacing an Above Ground Pool Skimmer
- Before replacing the liner, we removed the old skimmer and gaskets from the
 wall completely, and cleaned up both sides of the wall by scraping off a little rust and calcium. For bad rust, sand the area and apply a rust-proof paint and allow to dry.
 - Be sure the water is close to the bottom of the skimmer before you begin. If you cut into the liner too soon, the liner may stretch more and cause a hole in your new pool liner.
- The skimmer comes with two gaskets. I glued the rubber gasket in position onto the face of the skimmer, using some silicone. Then, my outside-of-the-pool helper held the skimmer and gasket up to the skimmer opening.
- I inserted the two screws that secure the skimmer to the wall. Usually there are two round headed screws that are tightened down first. After finding the screw hole, through the vinyl with my finger, I pushed the screw through the vinyl and tightened with a large Phillips screwdriver.
- Next, I placed the faceplate over the skimmer hole, with the thinner paper
 gasket on the pool side. I found each hole by feeling through the vinyl and running the SS flat head screws through with a long #3 Phillips screwdriver. Then I got out of that cold pool! Don't tighten all the way until all the screws are in place. Then go back and tighten all the screws as tight as you can until you hear the plastic faceplate begin to creak!
 - Next, we installed the skimmer weir and basket and threaded in the hose adapter into the bottom, using Teflon tape. I connected the skimmer hose to the adapter with a clamp.
- Final step: Using a razor knife, I carefully leaned over the wall and cut out the rectangle of vinyl inside of the skimmer faceplate. We saved this piece as patching material.
Adding a Second Skimmer to Your Above Ground Pool
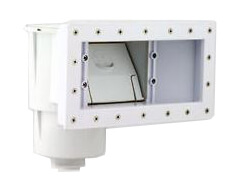
For those of you that have trees around your pool, a second skimmer will help to keep your pool cleaner. Or maybe you want to upgrade from the standard size above ground skimmer, to the Wide Mouth Skimmer shown left.
To tackle this job, you'll need a new above ground pool skimmer, enough pipe or hose to reach to the pool pump and a few plumbing fittings to connect the new skimmer line into the pump.
The best tool to cut the wall may be a 4-inch grinder, but you can also use a reciprocating saw with a fine tooth blade, or a jig saw can also be used. Cut from outside the pool wall.
- Decide where to put the new skimmer. Since the pipe will have to connect to the pump, the length of the run of pipe is the first consideration. Adding another skimmer on the same side of the pool will have a shorter run of pipe but may be too close to the existing skimmer to have a real impact. Also consider the location of the return line(s) and the direction they flow. A skimmer located too close to a rushing return line won’t be able to draw in many leaves, as the current may push them past the skimmer too quickly.
- Lower the water in the pool. Lower to a point below the bottom of the skimmer, of course – but not too low, keep at least 6 inches of water above the floor. This will keep the weight of the water on the walls and on the liner. When vinyl lined pools are drained too far, weak walls may collapse inward, or the liner will relax, pull away from the wall, shrink somewhat and develop wrinkles.
- Pull the liner away from the wall. If you have a beaded liner that fits into a track, pull up and out on the liner to remove it from the track in this area. If you have an overlap liner, you may need to remove one or more of the top rails to gain access to the liner clips. Next, place a shallow cardboard box or sturdy cereal boxes between the liner and the wall to keep the pool liner away from the area of the wall that will be cut out (with a very sharp power tool).
- Cut the wall. Well, measure first and mark the cutting lines with permanent marker. On most skimmers, you will cut four times, two sides, top and bottom. Use a 4-inch grinder with a diamond blade cutting wheel. Cut on the outside of the pool, not on the inside, wet side. Use great care with a grinder; they are hard to handle and can quickly lop off a finger! Use hearing and eye protection and wear a pair of heavy gloves, long pants and work boots.
- Drill the screw holes. Again, measure first before drilling, or use the faceplate of the skimmer as a template to mark the holes. Use a steel carbide drill bit of chosen size and after drilling the first hole, make sure that the screws will fit through before drilling the remaining holes. Make sure that the cardboard box is still in place to protect the liner from the sharp and hot drill bit.
- Screw the skimmer onto the pool. A gasket may be used on the back side of the wall, or not in some cases. If you want to use a gasket, you can make your own from a cereal box, using a razor knife to cut the proper size, and a hole punch to make the screw holes. Tightly screw the screws into the skimmer through the wall as tight as you can. You may need to remove the liner a bit farther out from the pool wall to position the screwdriver properly. Be careful if using an electric drill (around water) not to drop it in the pool. I like to use a large, long screwdriver that properly fits the screw head, twisting very tightly.
- Replace the liner into the track. Or over the wall for overlap liners. Reassemble any top rails, clips, screws, etc.
- Refill the pool to normal level. It's important to fill the pool before continuing, as the added water may stretch the liner vertically. Cutting the liner for the skimmer opening or screwing on the faceplate before refilling the pool could result in stretched holes and a leaking skimmer.
- Screw on the faceplate. With included gaskets that come with new above ground skimmers. Again, it’s very important to use a proper size, long handled screwdriver that you can really torque. A #2 Phillips head is usually best for skimmer screws. Crank these screws as tightly as you can, using a star pattern to apply equal pressure. Screw them down until you hear the plastic creak and groan, or crack just a little.
- Cut out the liner. The liner material inside of the faceplate. Use a razor knife to cut out along the inside of the frame (faceplate). Save this piece of vinyl as future liner patch material.
Oh, did I forget about connecting the skimmer to the pump? You may want to do this part as step No. 8.5 – before the pool water enters the skimmer and pours onto the ground. If you already have one skimmer, you may want to use a three-way valve, like a Jandy valve, to control both skimmers with one valve. Alternatively, you can use separate two-way valves on each line.
Leaking Above Ground Pool Skimmers
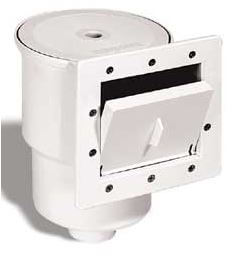
If you have discovered you have a leak at the skimmer you may not have to replace the whole skimmer.
If the leak is between the skimmer and the wall, you can first try to clean up the wall and replace the rubber gasket to see if that solves your problem.
If the leak is from a crack in the housing of the skimmer, you may be able to repair it with pool putty or silicone, if you'd rather not replace the entire skimmer.
I have to say it's an easy job, replacing a pool skimmer. We were done in under 30 minutes. It took me longer to write this post than it did to actually install the new skimmer! Visit our Hayward above ground pool skimmers page and make your plans today!