10% Off Sitewide Sale + Free Shipping No Minimum*
Top 5 Swimming Pool Sand Filter Problems
Your pool's sand filter plays a big role in keeping your water fresh and clean. As the pool water is pumped through the filter, the sand inside the tank traps dirt and debris. Without this function, your swimming pool can quickly go from dazzling to dirty. If you're experiencing sand filter problems, the quicker you can resolve them, the better. This post will detail the 5 common sand filter problems and how to resolve them, so you can get your pool back to its gleaming self!
SAFETY TIP: Always shut off power to your sand filter and set mode to "winterize" before you begin to investigate or repair a problem.
Job Materials
- Philips-head screwdriver
- Flat-head screwdriver
- Needle-nose pliers
- Loctite 401 or 403 glue
1. Loose or Broken Multiport Valve Handle
The multiport valve on your sand filter is a powerful piece of pool equipment. As the name implies, a multiport valve has numerous internal ports, or pathways, for the pool water to flow. These valves have a lever handle that you can rotate to set one of the seven filtering functions. By changing the position of the handle, you can initiate the filter, backwash, recirculate, waste, rinse, winter, or closed settings. The pool water will be routed a certain way, depending on which setting you choose. This function allows your pool filter to efficiently perform several maintenance operations.
With all that being said, if your multiport valve handle is loose or broken, you won't be able to use all the functions your valve has to offer. Below we will explain how to repair a faulty handle.
Loose Handle
If you notice that your multiport valve handle is wiggly, this could be due to a loose or broken spring within the key seal assembly. Thankfully, replacing the spring is fairly simple.
- Unscrew the lid of your valve to access the key cover assembly.
- While pushing down on the top of the assembly, use a hammer and screwdriver to gently tap on the pin holding the handle in place until it pops out. Unless you can grow an extra set of arms, you will probably need backup for this step!
- Set the handle off to the side and lift off the top portion of the assembly. Check the integrity of the washer that sits underneath the handle — replace if worn.
- Remove the current spring, and replace with a new one.
- Check the o-rings on the stem as well. Clean or replace if any are dirty or broken.
- Reassemble the key seal carefully, ensuring all parts go back in the right places.
- Screw lid back on snugly.
Broken Handle
A broken multiport valve handle might seem like a bigger problem than a loose one, but it's actually a bit easier to fix. Follow steps 1 and 2 listed above to remove the valve handle. Again, check the washer and replace if needed. Attach your new valve handle by inserting the pin back into place, then screw the lid back on.
2. Leaking Waste Line
A bit of water dripping out of your sand filter's waste line after backwashing the filter is a normal occurrence. However, if this drip continues for a long time and/or the drip becomes more intense, you could have a problem on your hands. Typically, an old or damaged spider gasket is to blame for a leaking waste line.
Replacing the Spider Gasket
- Unscrew the lid of your valve to access the key seal assembly.
- The spider gasket will either be glued to the rotor — the bottom piece of the whole key seal assembly — or sitting inside the valve body.
- If the spider gasket is glued to the rotor, you will need to replace the entire rotor.
- If the spider gasket is located inside the valve body, peel it off with your hands or pliers.
- Once the old spider gasket is removed, clean and dry the valve.
- When everything is dry, apply a small amount of glue to the edges of the grooves in the valve, and place the spider gasket flat side down into position.
- Let the glue dry completely, then put the key seal assembly back together.
Check out this link for a complete list of products you might need to replace within your multiport valve.
3. Sandy Pool
It's common to see a small build-up of sand on the bottom of your pool after replacing the sand in your filter, or running the backwash cycle. However, if the amount of sand in your pool increases, you are likely dealing with a broken lateral or standpipe inside the filter.
Laterals are plastic parts at the bottom of the sand filter, with small slits that keep out sand grains. It could also be a broken standpipe or diffuser — all internal parts that can leak sand into the pool if cracked. The solution? Drain the tank, scoop out the sand, and replace the entire set of laterals. You can reuse the filter sand if it's still in good shape. Generally, pool filter sand lasts about 5–7 years before it wears out and needs to be replaced.
While a broken lateral or standpipe is frequently the reason for leaky sand, here are a few other potential problems that could be turning your pool into a beach:
- Worn-Out Sand: The sand becomes smooth over time and isn't able to trap dirt and debris.
- Calcified Sand: Very hard water minerals will turn the sand into sandstone.
- "Mudballing": Oils collect in a sand tank, making gooey balls of gunk in the top third of the sand.
- Bypassing: If the pump is too powerful, dirt could be bypassed straight through the filter, without being properly processed.
4. Low or High Filter Pressure
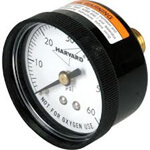
For most pools, the ideal sand filter pressure range is from 10 to 25 psi. An obstruction in the system or incorrect sand levels are often the cause for an increase or decrease in pressure. If the sand filter pressure drops below 10 psi, first check for a clog before the filter. Clean out your pool skimmer and inspect the impeller in your pump. If there are no issues in your pump, the problem could be due to low pool water levels or not enough sand in the filter. Top off your pool water or add more sand to the filter and you should be good to go.
If your sand filter pressure is too high, the first step is to backwash the filter. Dirty sand will cause the filter pressure to rise. If this doesn't resolve this issue, you may have too much sand in the filter or an obstruction. Check your sand levels and remove any excess if needed. If you suspect an obstruction and are not sure how to clear it out, contact a professional for assistance.
5. Cracked Tank
Sand filters are highly pressurized pieces of equipment. Therefore, if the tank cracks, it needs to be replaced. Unfortunately, no amount of MacGyver-level duct-taping skills will safely repair a crack. It is generally cheaper to replace the entire sand filter than to repair a cracked tank.
Diagnosing and repairing sand filter problems quickly is important. A well-functioning sand filter is crucial to keeping your pool clean and enjoyable. Thankfully, many common sand filter problems are relatively easy to resolve.