10% Off Sitewide Sale + Free Shipping No Minimum*
DIY Repairs to Swimming Pool Tile
Pool tile at the waterline is a protective and decorative element on in-ground pools. If your pool tile has begun to crack and crumble, repair it! There are many different options when it comes to repairing or replacing the tiling around your pool. This article shows you the DIY way to repair and rejuvenate your pool tile.
Where to Buy Matching Pool Tile

Starting at the bottom of the materials list may be best. If you have just a few pieces that fell off, and you have the pieces, you're fine. But if you have more than a few inches of tile to replace, using "sheet tile" is easier and gives a better result.
Where can you find the original pool tile used by your pool builder? The first place to ask is your pool builder, if they are still around. Snap a photo and email it to them if they need more detail other than color, style and when the pool was built.
The second best place to look are local pool stores, which can order from a local pool supply distributor or from another source. Again, a picture or tile sample is most useful. You can also call ceramic tile stores in your area to see if they carry any "frost-free" swimming pool tiles. Next, you can search online. There are some websites with lots of pool tile catalogs you can look through.
If you can't locate the tile, you could use a close match tile, especially for small repairs, maybe on areas you can't see from the house! Buy the same color, and close to the same size and shape, if it's mosaic tile.
Pool Tile Repair Materials List:
- Small chisel and hammer
- EZ Patch #1
- 1/4-inch notched trowel
- Sponge or rag
- Mixing bowl or small bucket
- Matching pool tile
Tile Bed Preparation
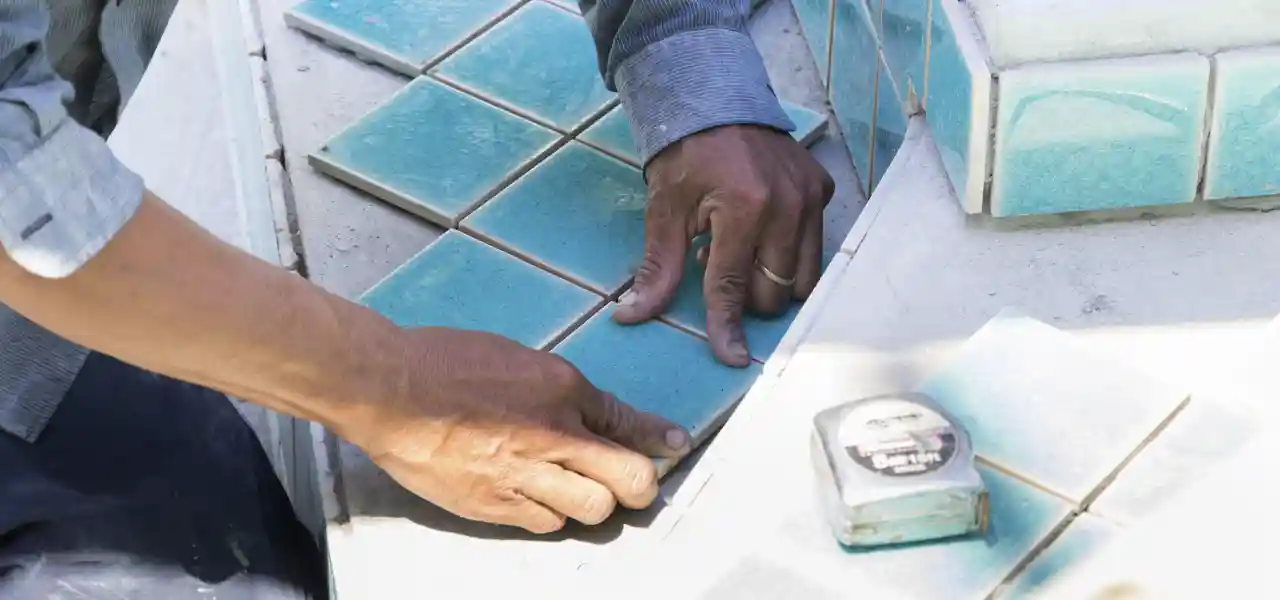
The surface that you reapply tile to may need some work. In the top image, we see a broken out area that was patched with some hydraulic cement to bring the surface up to level with the surrounding tile bed. If there are sizable cracks, enlarge them and remove any loose material with a disk grinder or chisel, and fill them with hydraulic cement (if deeper than 1 inch) or EZ Patch #1 (less than 1 inch). Fill in any holes to create a flat, even surface for the new tile. Allow any patches to dry for 24-48 hours before continuing.
Use the chisel or a small, sharp flathead to remove any pieces of grout still stuck to the surface and to create a good ledge. This bottom edge, or the notch in the pool plaster, is useful when hanging new tile. If the surface has been exposed for some time, it may be good to clean it before retiling. A degreaser such as TSP or Simple Green can be used for cleaning to improve the bond of the tile cement.
Cracks Behind the Pool Tile?
If there are large cracks in the beam (the area of the pool wall behind the tile), stop! This is called beam damage and should be opened up and filled with hydraulic cement, pushing the cement as far as possible into the crack to reduce the possibility that your tile will fall off too soon. Pay attention to large cracks in the beam, as these are likely the cause of the tile falling off.
Such cracks are often caused by a faulty expansion joint, allowing the pool and pool deck to touch during expansion and contraction. As they both expand, the deck wins, pushing into the pool wall. In cases of active beam damage, expect a tile repair to only last a year or two unless the larger issues are dealt with. In worst cases, this involves removing the coping stones, replacing the top portion of the wall, and restoring the expansion joint between the pool wall and pool deck.
Replacing Pool Tile
During a cool part of the day, use pool water or a hose to wet the area to be repaired thoroughly. If the surface is hot and dry, it will suck the moisture out of the setting bed of mortar. Mix up small batches of EZ Patch, 1 cup at a time, with water and the included bonding additive. Mix until a peanut butter consistency is reached. Spread it onto the moist tile bed with a 1/4-inch V-notched trowel, raking the bed to create 1/4" rows or furrows of the EZ Patch tile repair mix.
Quickly position your sheet tile and press it firmly and evenly into the bed of pool mortar. Some will squeeze through the tiles and out the sides. Be sure to press on all areas or pieces of the tile and that the tile remains level and plumb. Mosaics need some extra finesse to align and space the pieces correctly.
If the mix is too wet, or too dry, or the bed too thin, the tile may slowly fall off. After placing the tile, stay with it for a few minutes to be sure it's not sliding. Then keep an eye on it as you move on to the next tile section. EZ Patch Fast Set gives you only 5-10 minutes to work with the mix. Mixing small batches, progressing foot by foot, is most efficient.
After your tile has been set, gently wipe away large hunks of excess tile mix, but avoid cleaning or touching the tiles too much for 24 hours.
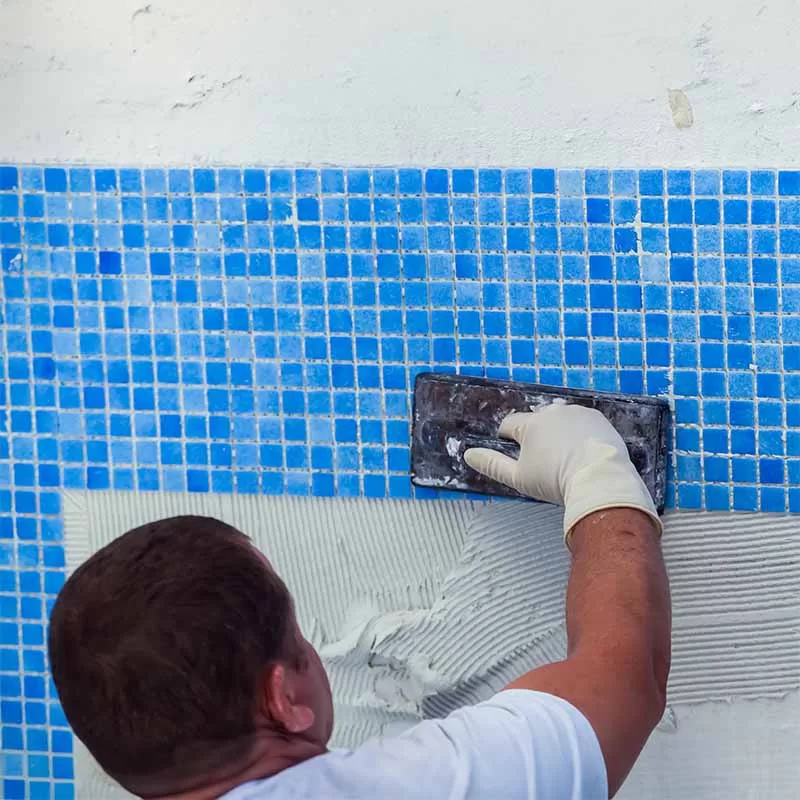
Grouting Pool Tile
After your tiles have set up for 24 hours or so, you can grout in between the tile pieces. EZ Patch #4 is an excellent waterproof pool tile grout. Again, mix up small batches of 1 cup or less to the peanut butter consistency. Use a sponge, grout spreader, or a piece of stiff cardboard to force the grout into the spaces between tiles and the space above the tile. EZ Patch 4 also makes an excellent material to parge the area where the tile meets the skimmers.
After it has set up for 10-15 minutes, use some water and gentle rubbing to clean up the extra grout that smeared onto the tiles. Then, after 24 hours, you can use a stiff brush or scrubber to remove the haze and polish the tiles. Finally, after the grout has dried for a few hours, you can begin to fill the pool level again.
Tile Repair Cleanup
After the grout has set up for about an hour, you can gently give it an initial cleaning with a wet sponge or small towel. Allow the tile grout to set up overnight, and you can then give it a final cleanup with a sponge or towel, buffing to remove the white haze. Any "glops" that fall in the pool can just be brushed off the surface. If they harden onto the surface, a chisel or screwdriver will pop them off easily.
The hardest part about making small pool tile repairs may be finding the replacement tile. Once that's done, the rest is easy breezy.