FREE Standard Shipping On All Orders $100 or More!*

5-Step Hayward Pool Filter Repairs
Making your own pool filter repairs is the subject of today's post. I've outlined the 12 most common repairs that you may need to do at some point to your Hayward filter or to any pool filter. Simple hand tools are all that's required to maintain and repair a Hayward pool filter, along with a few Hayward filter parts.
Hayward Sand Filter Repairs
Changing the filter sand
Replace your filter sand every five-seven years or sooner if your filter is undersized or if it has cleaned up a few algae blooms. We have an entire "How To Change Pool Filter Sand" post about how to change pool filter sand, but here's a five-step summary.
- Drain the tank by removing the drain cap.
- Remove the top-mounted valve or dome.
- Scoop out sand or use a wet/dry vac to remove.
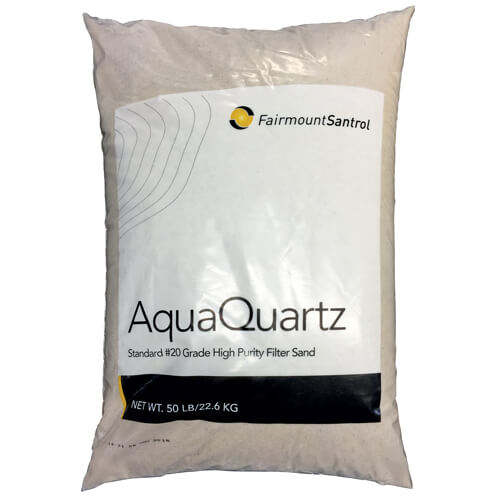
- Pour in new #20 silica sand, labeled pool filter sand.
- Replace valve or dome securely, start up filter on rinse.
Replacing the lateral
Replace your laterals every 10 years. When one cracks, replace the entire set of laterals. If sand begins to pour into your pool, the usual cause is one or more broken laterals, or a cracked standpipe. Here's how to fix it in five steps.
- Drain tank and remove sand, as described above.
- Fold up the laterals vertically or unscrew threaded laterals from hub.
- Snap in or screw in your new sand filter laterals.
- Cap the standpipe and pour the sand back in, or use new sand.
- Replace valve or dome securely, start up filter on rinse.
Hayward Multiport Valve Repairs
Valve Change
Spider Gasket Change
Cracked Valve Body
Valve change
If your multiport valve begins to leak or the handle loses tension, you could repair it with a new key assembly or a new spider gasket, or you could just replace the entire valve in just five steps.
- Cut pipes with hacksaw, leaving enough pipe to reconnect.
- Unclamp valve from tank, wiggle and pull up to remove.
- Lube O-ring and push new valve on standpipe; clamp tightly.
- Wrap threads four times with Teflon; screw hand tight, plus 1-1/4 turn.
- Rejoin pipes with coupling or union; using PVC primer and glue.
Spider gasket change
Losing water out of the backwash line? Remove the top of the multiport valve and inspect the spiderweb style gasket. If it's twisted, broken or worn, here's how to replace it, five-step style.
- Remove six screws around valve lid and pull out key assembly.
- Use small flathead screwdriver to remove all of the old gasket.
- Place small dabs of super glue or silicone in the grooves.
- Press in new gasket, wipe off any excess silicone.
- Reassemble by replacing key assembly in the proper orientation.
Cracked valve body
If there is a small crack around where the pipes screw into the valve ports or where the pressure gauge screws in, these were overtightened or had too many layers of Teflon tape (use three-four layers over clean threads).
- Obtain Super Glue or a liquid two-part epoxy, like Plast-Aid ®.
- Cut pipe on cracked port, or remove gauge and clean threads.
- Thread pipe or gauge into hole to expand crack to its widest.
- Fill expanded crack full of Super Glue or liquid epoxy.
- Quickly remove pipe or gauge; allow glue or epoxy to set up.
Hayward Cartride Filter Repairs
Leaking Pipe Connections
Loose Filter Clamp
Cracked Filter Tank
Leaking pipe connections
If your filter is leaking where the pipes come in and out, inspect for cracks around where the pipes screw in. Fill with epoxy as described above. If leaking around the pipes, replace them in five steps.
- Cut leaking PVC pipe(s), leaving 2 inches of clear pipe to reconnect.
- Unthread the pipe(s) from the filter in/out port.
- Wrap new male threaded adapter with four layers of Teflon tape.
- Screw new MTA fittings into filter body, hand tight, plus 1-1/4 turns.
- Rejoin with pipe, a coupling or union, and PVC primer and glue.
Loose filter clamp
For your safety's sake, when you start up the filter, if the belly band holding the tank halves together or holding the multiport valve is leaking, shut off the pump immediately and take these five steps.
- Remove clamp band and top filter half completely.
- Remove belly band O-ring and wipe clean with paper towel.
- Replace tank O-ring and apply a thin layer of pool lube.
- Replace lid and tighten up clamp band as tight as it will go.
- If it still leaks, loosen clamp band, reposition it, and retighten.
Cracked filter tank
If your filter tank has a pinhole leak or a full-blown crack, the only repair to make it to replace the filter tank. For sand filters or older stainless steel tanks, it's not cheaper to buy an entire new filter, but depending on the age, filter tanks or tank halves can cost 50-80 percent of the cost of a new filter.
Hayward D.E. Filter Repairs
Grid Replacement
Manifold Replacement
Finger Replacement
D.E. filter grid replacement
Every 10 years or so, D.E. filter grid fabric starts to break down and develop holes or rips. When one goes, the others will soon follow. We wrote a post with great pictures on how to change out D.E. filter grids, but here's the five-step executive summary.
- Remove wing nuts on top of manifold to disassemble completely.
- Place the manifold upside-down on two bricks facing upward.
- Start with the partial grid and push all of the grids into the manifold.
- Place the bottom spreader on top and work it between the grids.
- Replace the thru-bolts and tighten wing nuts, pulling assembly tight.
D.E. manifold replacement
Another cause of D.E. powder spilling into the pool is a cracked top manifold, or missing air screen or sock. Follow the instructions above for changing D.E. grids to replace the manifold.
D.E. finger replacement
If you have a Perflex D.E. Filter, you don't have filter grids, you have Flex Tubes, aka fingers. Like filter grids, these deteriorate over time. You can replace just a few if needed, or buy the entire filter nest assembly.
- Remove the nuts and bolts around the top and bump handle pins.
- Remove filter lid, then lift out the entire nest assembly.
- Slide off the tube sheet top and pull up the damaged flex tubes.
- Push the new fingers in place snugly; replace tube sheet top.
- With nest assembly in place, secure the filter top and bump handle.
Filter systems are under pressure and can explode or rupture if clamp bands are not properly installed, or if valves after the filter are closed or pipes plugged while the pump is running. Open the air bleeder and all return lines before restarting the pump!
Other Filter Problems

1. My filter needs cleaning or backwashing too often
When the filter is brand new, one might expect a filter cycle to last 30 days or longer between cleanings. As time goes by, the filter media (DE powder, filter sand, or the filter cartridge) breaks down and or clogs up, and may indicate that it's time to change the filter media. If you find yourself having to backwash your filter every week, you probably need to replace the filter media, assuming that your filter is properly sized.
Generally speaking, filter sand will last 5-7 years before the sharp edges become rounded, resulting in less effective filtration. D.E. filter grids can last longer, seven-nine years before the fabric breaks down and develops holes. And your pool filter cartridges will only last two-four years, depending on the work it has been asked to do. Eventually, all filter media will need a replacement, and a good indicator of when to change it is the length of your filter cycle.
2. My filter is not keeping my pool water clean and clear
This is a bit of a trick question, as it may not be the filter that is to blame. Are you running the pump long enough during the day? Is the sanitizer level correct? Are the pump and skimmer baskets clean? Is the water chemically balanced? And the biggest question of all: Is the filter properly sized? If the answer to all these questions is yes, refer to pool filter problem #1 above. The filter media may need to be changed.
Also make note of any other modifications made to the system recently. Were valves, chlorinators, heaters, or other items added to the filter system? Has a larger (or smaller) pool pump been installed? Has the plumbing been connected to the filter correctly? It's not backward, is it?
3. Pool filter pressure is too high (or too low)
Pool filter pressure gauges are an inexact instrument, let's establish that right now. They are also known to fail every 5-10 years. It should return to zero when the pump shuts off. Sometimes the needle is stuck on a bent dial face, they can clog up, or they just fall apart internally.
If your filter pressure is lower than normal, this indicates that there is an obstruction or blockage before the filter. Check for a clogged pump basket or pump impeller. If your filter pressure gauge is higher than normal, this indicates a blockage at or beyond the pool filter. Check for a clogged filter, partially closed return valve or obstruction inside of a pool heater or a return line.
Make your own filter repairs with our factory fresh, original Hayward pool filter parts, shipped fast from our nine parts distribution centers around the country. Besides Hayward parts, we carry filter parts for 20 other brands, old and new!
