FREE Standard Shipping On All Orders $100 or More!*
Reassembly & Startup of Inground Pool Equipment
Reassembling and starting up the pool filter is one of the most exciting steps for our customers who have just built their own inground pool. For other readers, you may have just purchased a new home with a pool or have been opening it for a few years now, and just want a refresher on how to start-up an inground pool.
After removing your pool cover, you will want to remove the winter plugs from your return wall fittings or pool cleaner lines. Replace any directional eyeball fittings by screwing them into the wall fitting.
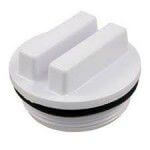
Open the skimmer lid, reach down into the skimmer and locate the skimmer plug with your finger tips (you can also use long, straight pliers). Or you may have a Gizzmo in your skimmer, a tall ice equalizer / plug. In either case, remove it.
Replace the skimmer basket, and inspect the skimmer weir door operation. Scrub the inside of the skimmer throat and side walls with a wet scrub sponge to remove any algae, dirt or scumline.
Now for the pool pumping, filtering, chlorinating and heating equipment. All of these pieces of pool equipment should have drain plugs that were removed and either reinstalled, or stored separately. A common place for winter storage of these reassembly items is in the pool pump basket.
There are a list of things to attach back up again before getting your filter up and running.
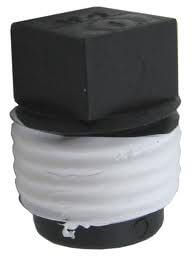 Your pump usually has 2 drain plugs, one that drains the basket area and one further back to drain the impeller housing. Use Teflon tape on the plug threads before screwing them back into the pump. If your plugs use an o-ring, lube with Silicone or Teflon lube, and replace when needed. Clean the pump lid o-ring with a rag and lube it with a Silicone lube.
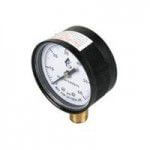 Your filter typically has 1 drain plug. Sand filters typically have a small plug or cap, while cartridge filters typically have a larger 1.5" threaded plug, usually located in the lower piping exiting the filter. Use Teflon tape on plug threads and Silicone lube if it has an o-ring.Your pool filter also has a pressure gauge that was probably removed at closing. Thread it into the air bleeder assembly at the top of the filter, or into the side of the multiport valve. Use Teflon tape on the threads and tighten to the most visible facing direction. Do not over-tighten.
- Chlorinators may have a drain plug on the side. Remove the lid carefully, if tablet pieces were left in over the winter - the fumes will be strong. Lube the lid o-ring and add some chlorine tablets to your feeder.
- Pool Heaters typically have 2 plugs, a drain plug in the front header and the rear header. Heat pumps usually have a small plug on the lower exiting pipe, but sometimes not, many are drained at the unions. Solar systems usually have some plugs at the bottom of the pipes that come off the roof, or at the bottom corner of the solar panel array.
Inspecting the Filter Media
Cartridge pool filters lose a little bit of their filtering ability with each cleaning. After 20 or so cleanings, or 3-5 years, you should consider replacing them. Inspect your cartridges for broken ends, broken horizontal bands, or crushed pleats. Mold, algae or mineral staining can also reduce the filtering of pool filter cartridges.
DE pool filters should have the internal grid assembly inspected for rips in the filter grid material, DE powder that was not removed at pool closing (tsk-tsk), or cracks in the manifold that sits on top of the filter grids.
Lube the small o-ring on the standpipe that the manifold fits over. Also, make sure the o-ring that joins the two filter halves or the top to the bottom is clean and lubed and that you have tightened the clamp or bolts properly and securely.
Sand Filters begin to lose the sharp edges over time, and can become clogged with oils and minerals. On average, pool filter sand will last about 5 years.
If you have had algae problems through the previous pool season it may be time to change the sand. If you are leaving in the same filter sand this year, start the filter up on backwash so it will flush any dead, dry algae out of the filter sand.
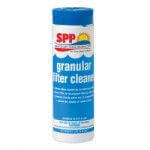
For all 3 filter types, if you are not replacing your filter media this year, or if you want to improve your filtering, clean the filter with a pool filter cleaner product. Break down clogging oils and minerals, and restore filtering ability to filter sand, cartridges and de filter elements with a pool filter cleaner.
Now that you have everything back to the way it was before you closed up your pool for the season - you are ready to start it up. Make sure your water level is at least halfway up on the skimmer.
Priming the Pump
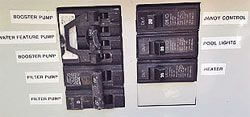
Open up your pump basket and fill it with water. Replace the lid and turn on the circuit breaker in the subpanel box and then you probably have a switch or a time clock to turn on the pump.
Sometimes, it may take a minute or two to prime but soon it will have water flowing through it. If there is a bleeder valve on the filter tank, open it up to let the air push through.
Keep an eye on the pressure gauge as you start it up. If the pressure spikes suddenly, you should shut off the pump immediately and recheck your incoming and outgoing valves on the system to make sure that water can flow through.
Aboveground Pool Equipment Start-Up
Similar process, with not as many steps. Aboveground pool pump and filter equipment will still need to be lubed, connected and filled with water. Usually there are no freeze plugs to replace in the pumps and in a lot of cases the pumps were disconnected and brought inside for the winter (good idea). You will re-connect the hose from the skimmer to the pump and from the filter back to the pool return.
Check the filter hoses that run to and from the pool, to make sure they have no cracks and are still in good shape. You can air test them by blowing hard through one end while holding the other end of the hose firmly against your thigh. Clamp them tightly so that they don't blow-off during the middle of the night.
Above ground pumps do not need to be primed in most cases as the water is flowing down from the skimmer to the pump, or the pump sits below the water level. Just replace the drain plugs and make sure the shut-off valves are open on both sides of the filter.
Everything else for aboveground pool start-ups will be the same as mentioned above for inground pools. Fill up the pump basket and plug in the extension cord and you should quickly see water pumping through the filter and back to the pool.
Next step - test and balance your pool water chemistry!