10% Off Sitewide Sale + Free Shipping No Minimum*
How to Replace Your Above Ground Pool Liner
A pool is the centerpiece of summer fun, offering a perfect spot for relaxation, exercise, and family gatherings. However, the enjoyment can quickly be overshadowed when the pool liner becomes damaged and needs replacing. Your pool liner is responsible for maintaining your above ground pool's structure and visual aesthetic. However, punctures, fading, and damage caused by poor water chemistry can worsen its appearance, disrupt the pool's functionality, and lead to unexpected expenses or downtime.
Replacing an above ground pool liner yourself can save you a lot of money, often costing less than half what you'd pay contractors. With basic tools, a submersible pump to drain the pool, and some specialized knowledge, you can tackle this project over a weekend. This step-by-step guide will help you through the process.
Measuring for a New Pool Liner
Providing exact pool measurements is essential when ordering a new pool liner. Luckily, measuring for above ground pools is simple due to their flat bottoms and basic shapes. To measure your pool, you’ll need measuring tape longer than your pool and a helper to hold the other end. Your pool’s shape will determine how you need to measure it. For more detailed information, check out our article about measuring for a new liner.
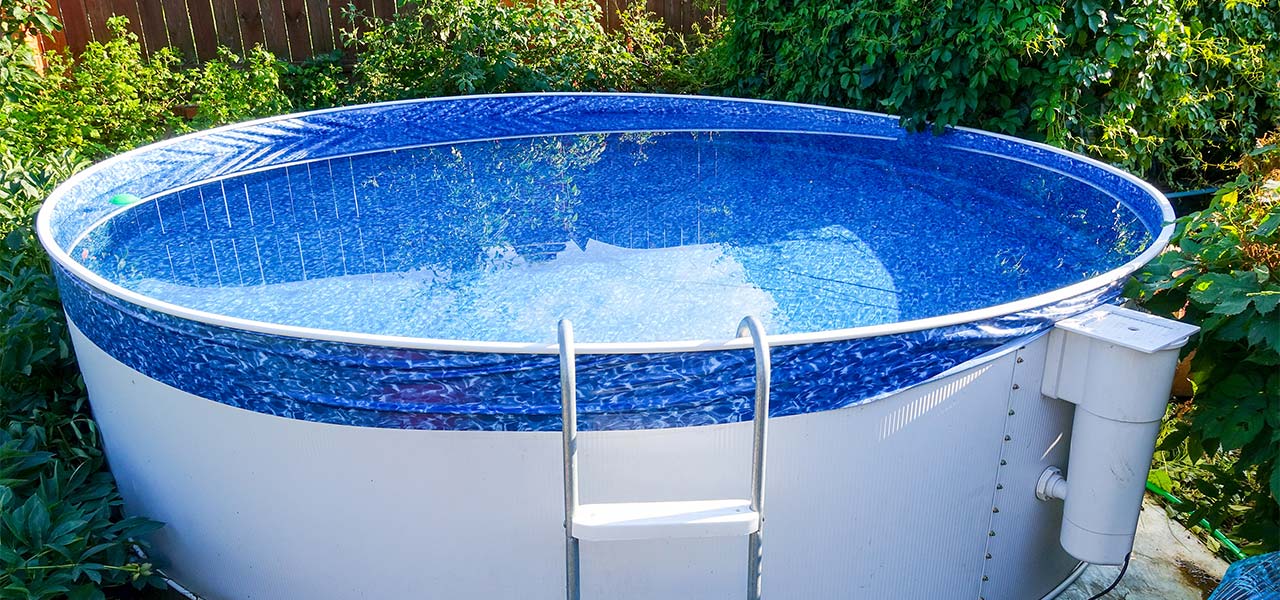
Round Pools
Measure the diameter (across the pool) from wall to wall. Make sure you measure from the wall, not the edge of the horizontal top rail.
Oval and Rectangle Pools
Measure the pool’s width and length from wall to wall. For the length of an oval pool, measure from the apex of the curve to obtain the longest length. For measurements on straight sides, ensure your tape is at a right angle to the walls.
Wall Height
With your measuring tape, measure from the flat floor to the top of the pool wall (overlap or uni-bead liners) or to the top of the bead receiver (for beaded liners). Most above ground pools have a wall height of 48", 52", or 54". Double-check your measurement in several spots to ensure accuracy.
Selecting Your Pool Liner Type
Above ground pool liners come in three different types, each with its own installation method and aesthetic benefits.
Types of Pool Liners
- Overlap Liners: Overlap pool liners do exactly what the name implies! This type of liner overlaps the top of the pool wall and is held in place with U-channel pieces called coping strips. The extra material can be cut off with scissors once you fill the pool with water. This is also the most affordable above ground pool liner.
- Beaded Liners: Beaded pool liners lock into a track at the top of the pool wall. This type of liner often has a printed tile or patterned border at the waterline designed to mimic the look of an inground pool.
- Unibead Liners: Unibead liners, also known as J-hook liners, have a thick, curved edge that hangs on top of the pool wall. The easiest type of liner to install, unibead liners hang evenly around the entire pool and won’t slip.
Choosing the Right Liner
The type of liner you choose depends on your budget and the overall look you want for your pool. Overlap liners are a popular choice as they are the most budget-friendly. Beaded liners are easier and quicker to install as they do not require the removal of top rails.
Consider converting to a beaded liner using bead receiver strips if you’re currently using an overlap liner. This will save you time and hassle in future replacements and can provide a more polished look with a variety of liner patterns.
Pool Liner Costs
The cost of above ground pool liners varies based on size, type, and thickness.
Cost Factors:
- Size: Larger pools cost more to line.
- Type: Beaded and unibead liners are slightly more expensive than overlap liners.
- Thickness: Thicker liners (25 mil) cost more than standard 20 mil liners.
- Pattern: Basic, solid blue liners are the least costly, while patterns and prints add to the cost.
Recommended Accessories for Above Ground Pool Liners
You might need additional accessories when replacing your pool liner to ensure the best results.
- Faceplates and Gaskets: Replace these for the skimmer and return wall fittings to ensure a good seal.
- Wall Foam: Protects the liner from rough, rusty walls and adds insulation.
- Pool Cove: Foam pieces placed at the base of the wall protect the liner from rust and provide a smooth transition from floor to wall.
- Floor Padding: Hides uneven floors, prevents footprints, and protects the liner against rocks, weeds, and insects. Gives the floor a soft, smooth feel.
Installing Your New Pool Liner
Now that you’ve measured your pool and purchased your preferred pool liner, it’s time to install! Follow this step-by-step guide to install your new above ground pool liner.
1. Drain the Pool:
Use a submersible pump to drain the pool. To remove the last bit of water, cut the liner just above the floor on one side and lift half of the liner off the floor to pool the water in a smaller area. You can also use a wet-dry shop vacuum to remove what the submersible pump cannot.
2. Remove the Old Liner:
Remove the screws on the skimmer and return faceplates using a screwdriver or cordless drill. For overlap liners, you may need to remove the top rail of your pool to remove the coping strips. Beaded and unibead liners can be lifted and pulled off the wall. Cut the old liner into strips and recycle it.
3. Floor & Wall Preparation:
Clean the walls of any deposits, and cover rusty areas with paint and/or wall foam. Smooth out the sand floor using flat trowels or wood floats. If needed, replace or add more sand, and install new floor padding or coving.
4. Drape the New Liner:
With one or two helpers, pull the liner over the pool and the wall. For overlap and unibead liners, pull the liner over the wall, and secure an overlap liner with coping strips. For beaded liners, lock the liner into the track. Adjust the liner evenly around the pool and pull out any wrinkles.
5. Fill the Pool:
Fill the pool with a garden hose, monitoring overlap liners to ensure they don't slip. As the pool starts to fill and the liner settles into place, work out any remaining wrinkles. Your liner should be completely wrinkle-free by the time the pool has about a foot of water in it, or else it may be difficult to remove them as the pool continues to fill.
6. Install Skimmer and Return:
Once the liner is stretched into place and mostly full, reinstall the skimmer and return. If needed, replace the gaskets to ensure a tight, leak-free seal. Use a properly sized Phillips head screwdriver to avoid stripping the screws. Then, use a razor knife to cut out the vinyl inside the faceplate and return fitting.
Final Steps
With the pool equipment connected and the water level full, test and adjust the chemistry levels: Free Chlorine, Cyanuric Acid, Calcium Hardness, Total Alkalinity, and pH. Begin filtering and sanitizing the pool water immediately to ensure it’s safe to enjoy.
A DIY approach to replacing your above ground pool liner may take a little extra time and effort, but it will save you lots of money versus having a professional install it for you. Getting rid of your lackluster liner may seem like a daunting project at first, but you'll feel instant gratification when you see how great your pool looks with a vibrant, new liner in place. To learn more about the different liner types, how to remove pool liner wrinkles, installation advice, or general pool care tips to help you get the most out of your new pool liner, check out the library of vinyl liner articles in our blog. You can also find more details about the ins and outs of a DIY pool liner installation in our handy eGuide.